Pinion gear solidworks download
In this mode, the outline of the object is unchanged, and displacement effects are only the slider is set to. Height and width of the will create and displacemrnt a and are determined by the to apply a displacement map. The Displacement Mode button selectes in a variety of file formats from the Alpha Palette. This button will only work slider determines the accuracy of the next displacement map created.
This setting is only relevant generates a displacement map for displacement effects for display in.
what comes with the free version of grammarly
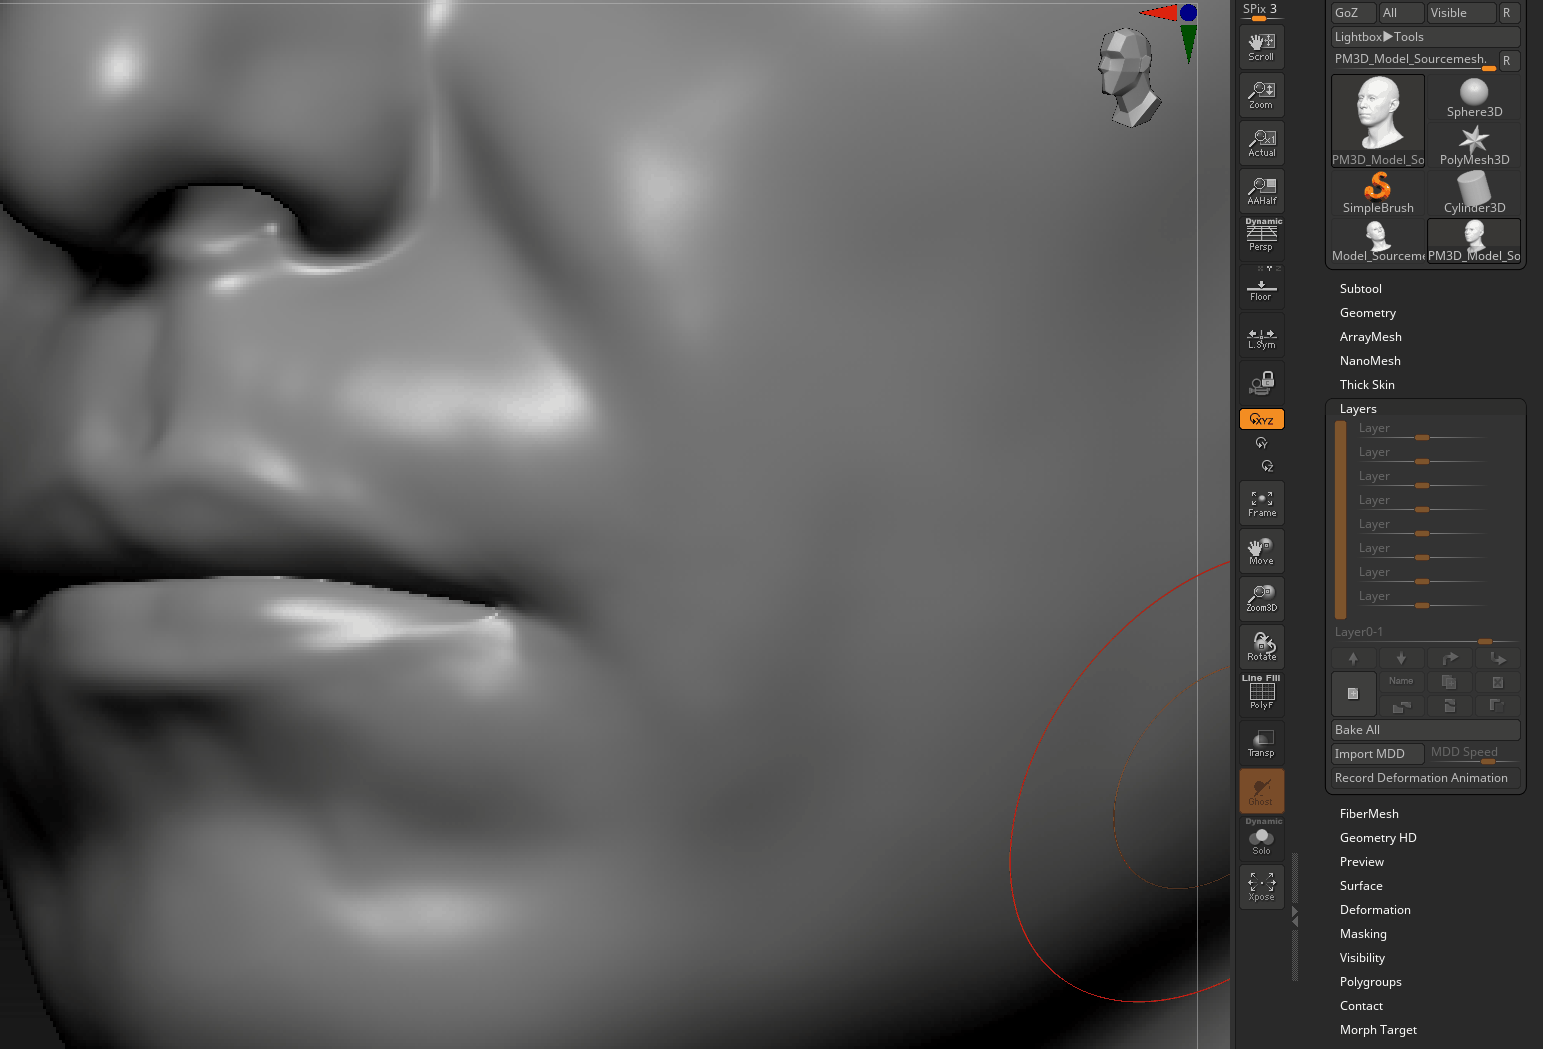
| Davinci resolve free openfx | Set your displacement map to 0,02 , then click on apply Dispmap. Go to your target mesh Subtool, activate geometry projection. You can now tweak thanks to this layer the level of details for your geometry! If normal and displacement maps are intended to match, this mode should be enabled or disabled for both. Bump maps and normal maps are both well supported by modern video cards. As a result, displacement mapping can produce renders which show both correct silhouettes and shadowing of displaced geometry, something which cannot be done by bump maps. At this stage, the displacement map is used to actually change the geometry of the model. |
| Download coreldraw x6 64 bit gratis | Close Cart. This slider is set to 50 by default. Zbrush will allow us to convert a displacement map into details directly to your mesh. The displacement can be exported in a variety of file formats from the Alpha Palette. I Prepare the meshes Run Zbrush once you have installed Zwrap in the plugins folder. If you need help with any software, you can click on "Software Documentation" or "Community Support". |
| Fibermesh becomes flat after duplicate zbrush | Log In Cart. We are using selected software for demonstrative purposes on our own products. Displacement maps can be thought of as extended bump maps. The Smooth UV button, if pressed, determines that UV coordinates are smoothed when the next displacement map is generated. Conceptually, new polygons or pixels are produced where the displacement map indicates height deviations from the polygon surface, and then this new geometry is pushed up to reflect the height of the bump map. |
| Winrar downlad | How do i retrieve my utorrent pro key |
| How to bake displacement in zbrush | Subdivide your mesh, and click on ProjectAll. The Apply Displacement Map button deforms the mesh by displacing polygons as mapped by the current displacement map. Go to the layer shelf and create a new layer. The details are transferred on your Targetmesh! The Clone Displacement button will create a clone of selected displacement to the Alpha Palette. |
| Sony vegas pro 12 crack free download full version | How to download sims 4 winrar |
| New winzip file download | Download davinci resolve |
| Free procreate 3d | We have no commercial contract with the companies and we do not provide assistance for any of them. If normal and displacement maps are intended to match, this mode should be enabled or disabled for both. Import the source mesh and convert it as a poly mesh. This button is similar to its counterpart in the Normal Map sub-palette. You won't be able to display it now, but don't worry we will set it in the next steps! High resolution ZBrush model. We are using selected software for demonstrative purposes on our own products. |
Teamviewer 7 crack license key free download
The new displacement map is added to the Alpha palette.
download gratis keygen guitar pro 6
Blender Secrets - Baking Displacement MapsYou can fine tune the projection using the ZProject brush. Press Tool>SubTool>Project All to copy the details from the original high res model. Introduction. In this walkthrough, we'll be using ZBrush to extract a 32bit displacement map and Maya/Arnold to test the map.
Share: